I wanted to build something cool using my new PIR-sensor. At the same time, a night light I had bought for the children stopped working. It was a IKEA light that looks like a ghost and that is meant to be used as a night light for children. I took it apart, but I couldn’t fix it. I did however salvage the outside – the ghost.
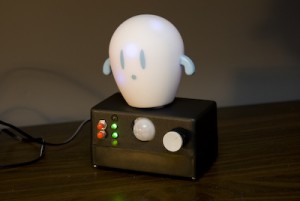
Putting the two things together seemed like a great idea – a ghost that lights up when it detects movement (or changes in infrared light), and the blinky ghost project was born!
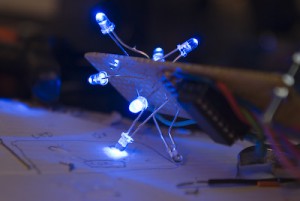
I connected the PIR-sensor to an Arduino and a bunch of LEDs. I used eight high-brightness blue LEDs which I control using a 74HC595 8-bit Shift Register.

The logic of the whole thing is this: when the PIR sensor detects a change, the eight LEDs start blinking rapidly. After some time, the LED blink less and less frequently, and eventually (after about 30-40 minutes) they stop blinking altogether. I also connected a buzzer so it would make some noise each time the PIR sensor fires a response.
After some bread-boarding prototyping, I found the buzzer to get quite annoying and I also wanted to be able to control the blinking without using the PIR. So I added two buttons and some status LEDs. And that’s it!

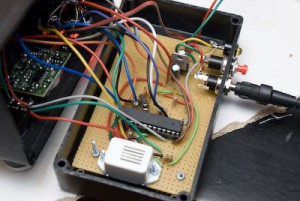
I built the stand alone Arduino ATMEGA 328 and a bunch of other components into a project box. I might have been able to squeeze it all into a smaller box, but this was the only box I had. In my experience, the project boxes tend to get quite jammed with stuff, so I normally prefer a larger rather than a smaller box. In the picture above, the voltage regulator is at the top of the photo close to the power supply. The ATMEGA Arduino is the big IC in the middle, and the buzzer is the white thing at the bottom. To the left you can see the inside of the lid and the backside of the PIR sensor.

The buzzer can be activated or deactivated by one of the buttons to the left – the LED next to the button is green for activated and turns red when deactivated. The PIR-sensor can also be deactivated using the second button on the left side. Then, the LED closest to that button turns red. These two options are stored in EEPROM memory, and re-read during power-up. When the PIR-sensor is deactivated, the intensity of the blinking is controlled with the knob on the right side.
It feels extremely rewarding to see it working like this! The idea is manifested into a physical gadget. Even though its usefulness may be debated, I’m very happy with it and I think it’s kind of cool!